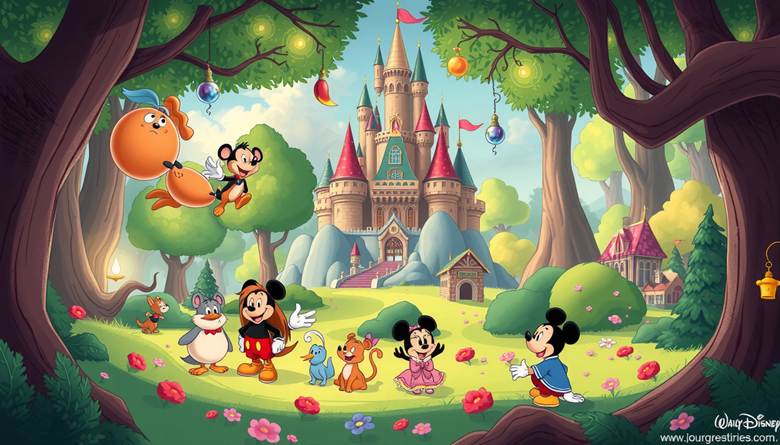
🍋 Book Concept:
Welcome to Draw the Magic, a whimsical, joy-filled guide to drawing 300+ adorable things in a Disney-inspired style! Whether you’re a young artist or a creative grown-up, this book will teach you how to sketch animals, food, objects, characters, and more — all with the sparkle, personality, and storytelling charm of your favorite Disney movies.
From big shiny eyes to joyful body poses and enchanted backgrounds, every chapter unlocks a new piece of the magical art puzzle. Get ready to bring your imagination to life, one delightful drawing at a time!
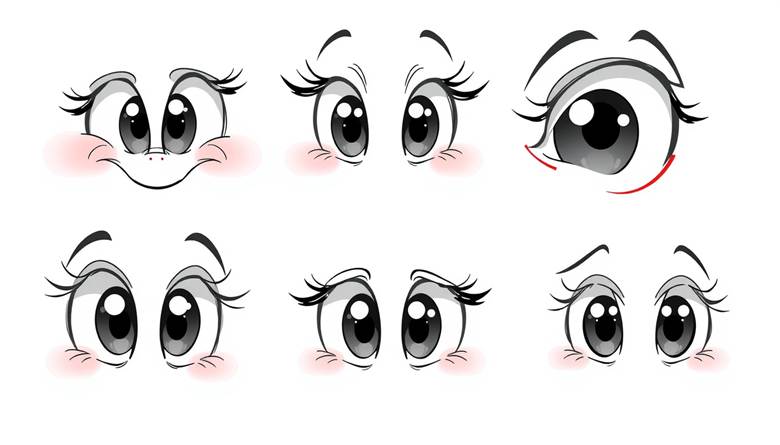
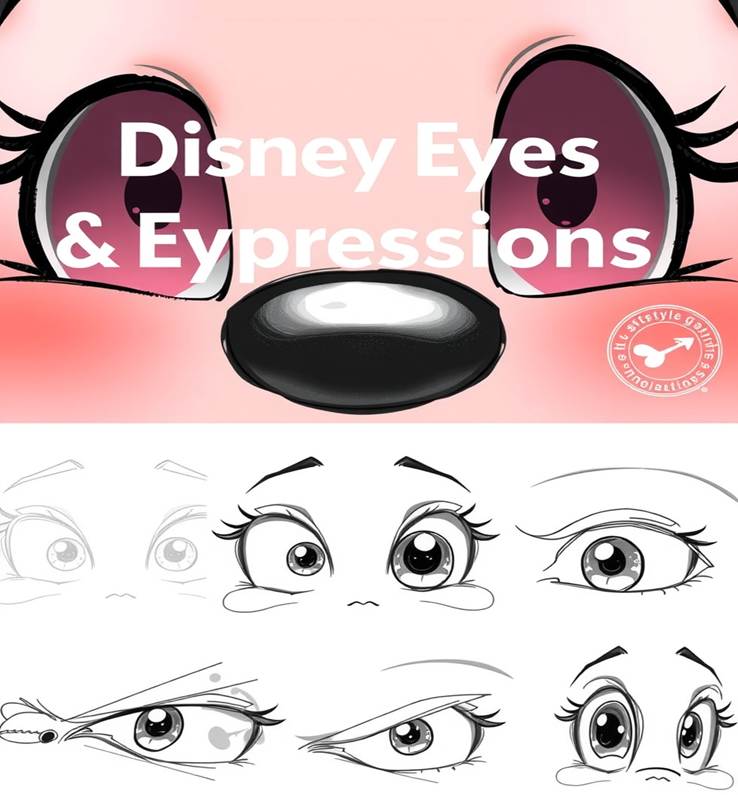
📙 Chapter 1: Disney Eyes & Expressions – Bring Your Drawings to Life
What makes a Disney character unforgettable? The EYES! They’re not just windows to the soul — they’re key to making your sketches shine with emotion, personality, and story.
✨ What You’ll Learn:
- How to draw big, expressive Disney-style eyes
- Techniques for showing emotion (happy, sad, mischievous, surprised, sleepy, excited)
- Eye shapes and sparkle placement
- Eyebrow positions that match the mood
- Simple facial expressions that turn a circle into a character
🖊️ Step-by-Step: Drawing Disney Eyes
① Draw the Eye Shape
Start with an oval or almond shape. Disney eyes are large and rounded — especially for cute or young characters.
② Add the Iris and Pupil
Draw a big iris that almost fills the eye. Add a black pupil inside but leave 1-2 white highlights (glimmers). These give your character life!
③ Eyelashes and Lids
Use curved lines for upper eyelids and add thick lashes (especially on female or cute characters). Add lower lashes if needed.
④ Add Eyebrows and Emotion
Now change the eyebrows to change the feeling:
- Upward and arched = surprised or curious
- Angled down = determined or angry
- Lifted and curved = joyful or dreamy
😃 Expression Practice!
Try sketching a simple circle for a head, then experiment with these eye + eyebrow combos:
| Emotion | Eye Shape | Eyebrows | Spark Placement |
| Happy | Wide, rounded | Curved upward | Top-right corner |
| Curious | Oval, centered | Raised and uneven | Centered highlights |
| Sad | Droopy and tilted down | Angled down & close together | Low on the iris |
| Mischievous | One eye half-lid | One brow up, one down | Twinkle in only one eye |
| Sleepy | Half-closed | Gently arched | Small, dim sparkle |
🎨 Mini Challenge: Design 3 Eyes with Story
Draw three unique eyes. Underneath each one, answer:
- Who do these eyes belong to?
- What are they feeling?
- What are they looking at?
Example:
- Big bright eyes, upward glimmer, wide lashes “A princess seeing fireworks for the first time.”
- Narrowed eyes, sideways glance, single sparkle “A clever raccoon planning a cookie heist.”
- Droopy lids, large iris, small glimmer — “A sleepy kitten who just woke up from a nap.”
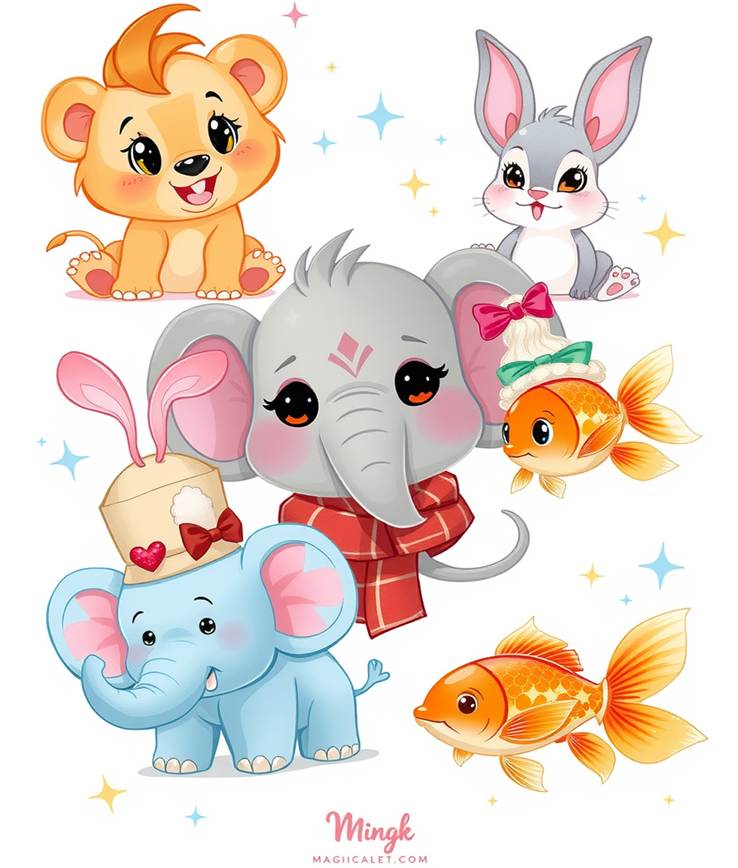
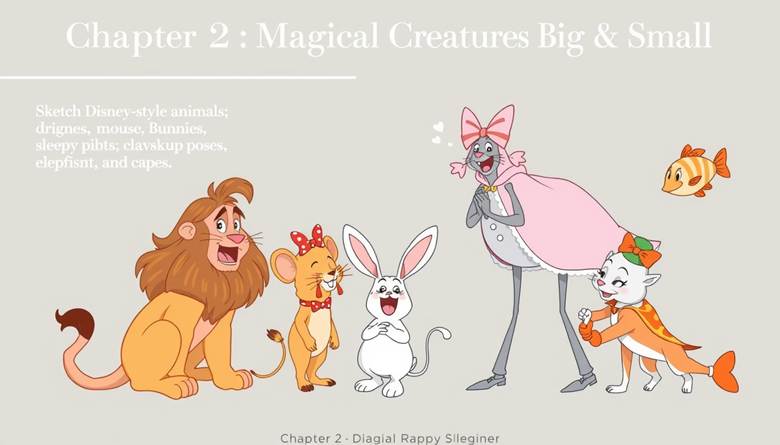
📚 Chapter 2: Magical Creatures Big & Small
Disney-style animals are bursting with personality—big eyes, tiny paws, and lots of heart. Whether you’re drawing a brave little lion or a curious fish, this chapter shows you how to bring creatures of all shapes and sizes to life with imagination and charm.
✨ What You’ll Learn:
✔️ Animal shapes and proportions in the Disney style
✔️ Expressive features like floppy ears, wiggly tails, and oversized feet
✔️ Classic poses: playful, sleepy, surprised
✔️ Adding accessories for extra flair: bows, hats, capes
🐰 Animal Proportions: Cute from Head to Tail
Disney creatures follow a few magical rules:
- Big Heads, Small Bodies: This baby-animal proportion creates instant appeal.
- Wide-Set Eyes: Gives a sense of innocence.
- Rounded Features: Avoid sharp angles—think soft curves and puffball tails.
- Tiny Limbs & Chubby Feet: Add charm with tiny paws and floppy feet.
🖊️ Step-by-Step: Sketching a Bunny
Let’s learn how to draw an adorable Disney-style bunny from scratch!
① Start with a Round Head and Small Body
Draw a large circle for the head and a small oval underneath for the body. Keep everything soft and simple.
② Add Big Eyes and Long Ears
Position the eyes low on the face and wide apart. For the ears, draw long curves that can flop down or stand tall based on the emotion you want.
③ Draw Fluffy Cheeks and a Cute Nose
Add puffy cheeks that puff out from the circle and place a tiny triangle nose between them.
④ Pose It!
Give your bunny personality through posture:
- Playful: One ear flopped, paw reaching up
- Sleepy: Ears drooping, eyes half-lidded
- Surprised: Ears straight up, mouth in an “O” shape
⑤ Accessorize
Let’s have fun! Try a bow on one ear, a magic wand, or even tiny glasses. Want a superhero bunny? Draw a cape fluttering behind!
🦁 Drawing More Creatures: Tips & Tricks
🦁 Lion
- Shape: Rounded head with a thick, poofy mane
- Personality: Brave or bashful
- Add a Ribbon: Tie it around the tail or ears
🐭 Mouse
- Tiny Body, Huge Ears: The bigger the ears, the cuter!
- Give It a Crown: Make it royal with a sparkly crown
🐘 Elephant
- Round and Chunky: Big floppy ears, short legs, tiny trunk
- Sleepy Look: Closed eyes and droopy posture
🐟 Fish
- Simple Oval Shape: Use gentle waves for fins
- Add Goggles: For an explorer fish or a swimmer
🎨 Try This! Create Your Own Magical Zoo
Draw one of each creature using the tips above. Name them and give them a personality:
- Leon the Lion who’s afraid of the dark
- Mimi the Mouse who dreams of being a queen
- Bubbles the Fish who wants to fly
- Snugs the Bunny who naps everywhere
- Ella the Elephant who never forgets birthdays
Use accessories to show who they are: add backpacks, lollipops, or superhero masks. Give them sparkles, stamps, or hearts around them for extra fun.
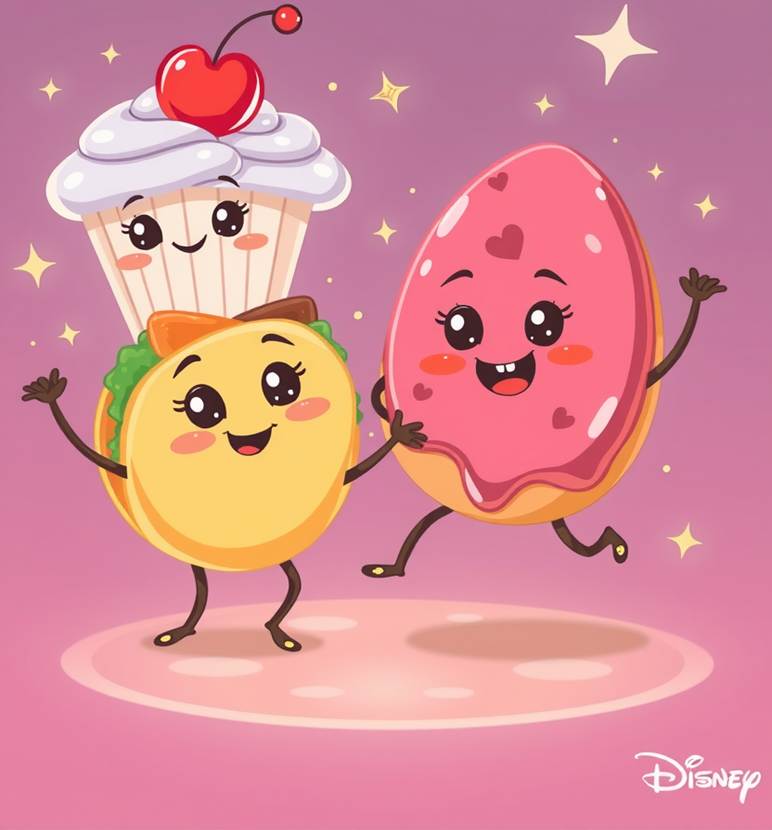
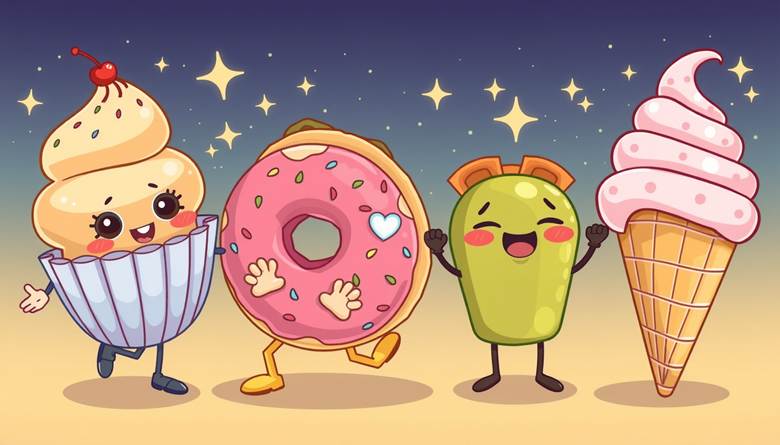
📚 Chapter 3: Fantasy Foods that Smile
In a Disney-style world, even your lunch can be laughed at! From ice cream cones that giggle to tacos with attitude, food becomes fun when you give it a face, a feeling, and a little flair. In this chapter, you’ll learn how to bring sweet and savory treats to life—one smile at a time.
✨ What You’ll Learn:
✔️ How to turn food into friendly, animated characters
✔️ Where to place faces for maximum cuteness
✔️ How to add motion, limbs, and expression to static snacks
✔️ Ways to decorate with personality: sprinkles, sunglasses, sparkle!
🧁 Food with Feeling: Make It Come Alive
To create food characters that feel alive, think about three magical ingredients:
- Face Placement
Faces go where attention naturally lands—on the top, middle, or a large surface. Ice cream? On the scoop! Cupcake? On the frosting! Taco? Right on the shell! - Lively Limbs
Add tiny arms, legs, or even dancing shoes to make your foods move. A doughnut can float. A slice of pizza can skateboard! - Emotion Through Toppings
Use swirly whipped cream eyebrows, olive eyes, sprinkle freckles, or a cherry nose to express joy, sass, or surprise.
🖊️ Step-by-Step: Drawing a Cupcake Character
Let’s bring a cupcake to life!
① Start with a Muffin Shape
Draw a wide-bottom trapezoid (for the wrapper) and top it with a fluffy swirl of frosting.
② Add Big Eyes and a Smile
Place the eyes right on the frosting or just above the wrapper. Add sparkle dots to make the eyes shine. Don’t forget a big, happy mouth!
③ Give It Movement
Add little arms (like noodles or sticks) and tiny feet (socks, shoes, or bare toes!). Posed it like it’s dancing, waving, or jumping.
④ Decorate with Personality
Is your cupcake shy or bold? Sweet or silly? Use toppings to show that:
- A cherry on top for cheerful
- Tilted swirl for playful
- Star sprinkles for sparkly energy
🍦 More Fun Food Characters to Try
🍦 Ice Cream Cone
- Scoop Shape: Big and round with drips for a dynamic look
- Expression: Melting with joy or screaming in fear (it’s melting!)
- Accessories: Sunglasses, whipped cream hair, or a bowtie cone
🌮 Taco
- Shell Curve: Use a crescent shape with layered fillings
- Face: On the middle of the shell
- Limbs: One hand waving, the other holding salsa
- Add-ons: Give it a mustache, glasses, or tiny maracas!
🍩 Doughnut
- Circle with a Hole: Add frosting drips
- Eyes: On the top edge of the ring
- Motion: Give it floaty balloons or roller skates
- Emotion: Sprinkle eyebrows and jelly-filled smiles
🎨 Try This! Create Your Own Food Friends
Pick your favorite snack or treat and turn it into a character! Try these:
- A banana with a pirate hat
- A cookie with headphones
- A milkshake riding a skateboard
- A pizza slice ballet
- A talking sushi rolls with a headband
Give them names, traits, and little stories:
- Crispy the Taco always tells cheesy jokes
- Swirla the Ice Cream melts when she gets nervous
- DJ Sprinkle the doughnut spins records and parties all night
💡 Quick Tip: Food Characters Look Best When…
✔️ The eyes are big and round (with sparkle dots)
✔️ The limbs are flexible like noodles or pipe cleaners
✔️ The expression matches the motion (happy dance, sleepy yawn)
✔️ You imagine their favorite hobby and draw it with them
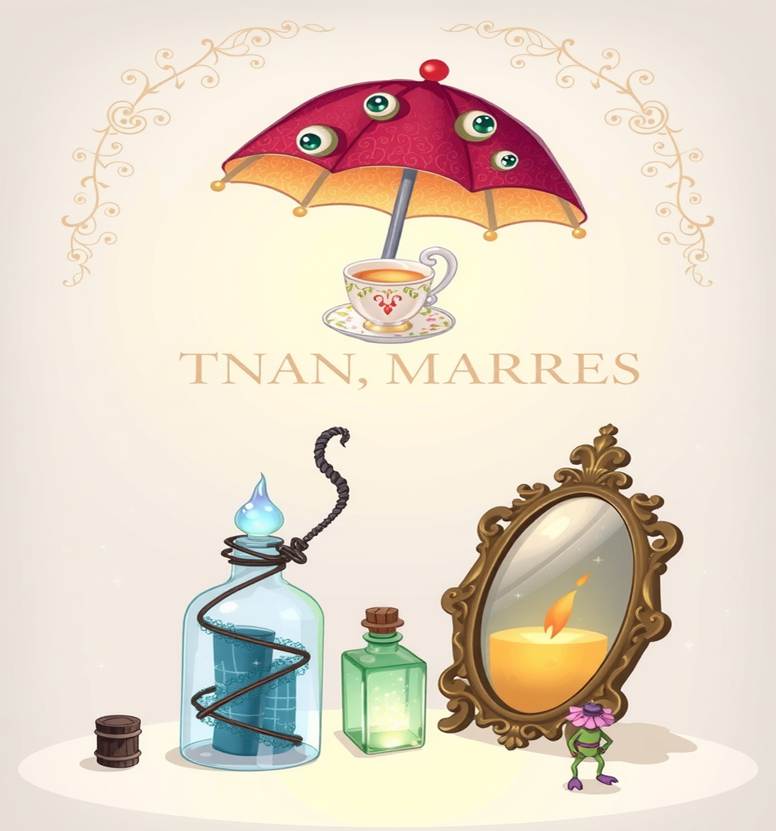
📚 Chapter 4: Tiny Treasures & Magical Objects
Not all magic comes with wings or wands. Sometimes it hides in the simplest things—a smiling teacup, a glowing pencil, or a book that floats just a little off the ground. In this chapter, we’ll turn everyday objects into sparkling stars of their own story.
✨ What You’ll Learn:
✔️ How to add faces to ordinary items like teacups, pencils, and balloons
✔️ Create movement and magic: floating, glowing, sparkling
✔️ Use highlights, shadows, and charm lines to bring objects to life
✔️ Add emotion and expression—even to a spoon!
🪄 Make the Ordinary Extraordinary
In Disney-style drawing, even objects have hearts, hopes, and big personalities. The trick is in how you pose, decorate, and animate them.
- Teacups can giggle
- Books can whisper secrets
- Umbrellas can sing in the rain

🖊️ Step-by-Step: Drawing an Enchanted Teacup
Let’s start by drawing a teacup who’s ready for tea and adventure.
① Draw the Basic Shape
Sketch a soft round teacup sitting on a small saucer. Add a curved handle on the side like a looped ear.
② Add a Face
Place big round eyes near the rim with sparkles inside. Add a gentle smiling mouth below and maybe tiny blushing cheeks.
③ Give It a Personality
- Shy? Lower the eyelids and tuck the cup slightly down
- Excited? Open eyes wide and tilt the cup upward
- Sleepy? Add half-closed eyes and a yawn curl in the mouth
④ Magic Touches
Add floating steam with heart shapes or stars in the swirls. Outline the cup with sparkle lines and use soft shading to give it glow and dimension.
✏️ Other Magical Objects to Try
📚 Floating Book
- Open or Closed: A slightly opened book with fluttering pages feels alive
- Face Placement: On the spine or front cover
- Magic Add-ons: Glowing title, bookmark tongue, sparkling dust around it
✏️ Pencil Pal
- Body: A long pencil with cute shoes and big eyes near the eraser
- Add-ons: Glasses for a smart look or a cape for a heroic sketcher
☂️ Umbrella
- Shape: Rounded top with little boots on the ends of the spokes
- Emotion: Tilt the umbrella for emotion—sideways for shyness, open wide for happy
- Magic: Add floating raindrops, tiny lightning bolts, or glittery wind
🎨 Try This! Give Charm to These Tiny Treasures
Draw your own version of these magical everyday items:
- A balloon that floats with giggles
- A spoon with a twinkle in its eye
- A backpack that glows when it’s full of dreams
- A mirror that winks when no one’s looking
- A potion bottle with a dancing glow inside
Challenge: Add sparkles, floating elements, and tiny shadows to make your object look enchanted and alive. Can your object tell a story without saying a word?
💡 Quick Charm Effects to Use:
- Spark Lines: Small stars or bursts around the edges
- Glow Halos: Soft colored outlines (yellow, blue, pink)
- Floating Dots: Like dust or bubbles for whimsical movement
- Shadow Pop: A soft shadow below the object gives it floating magic
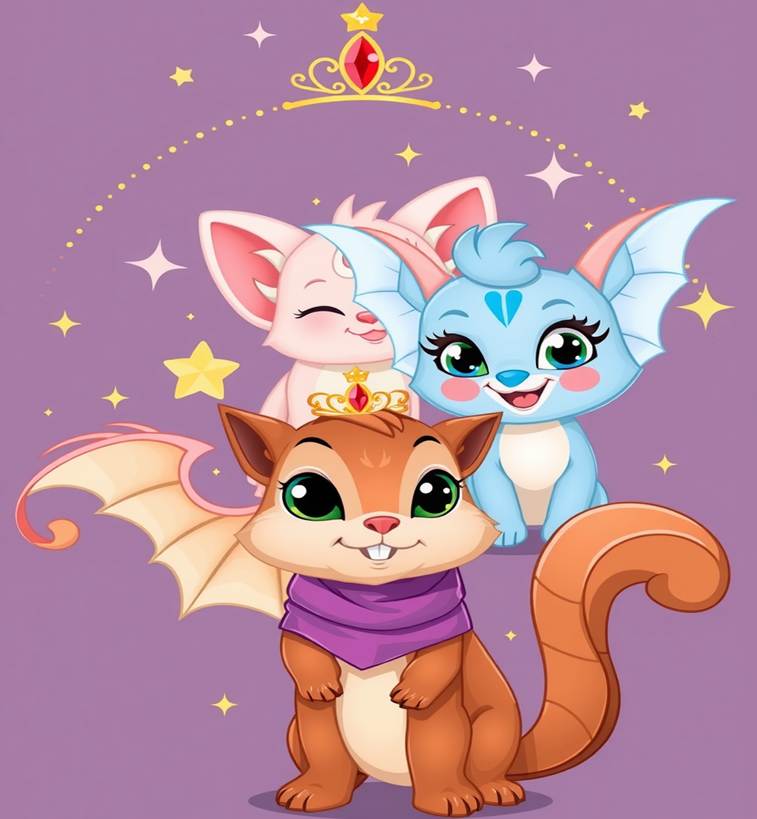
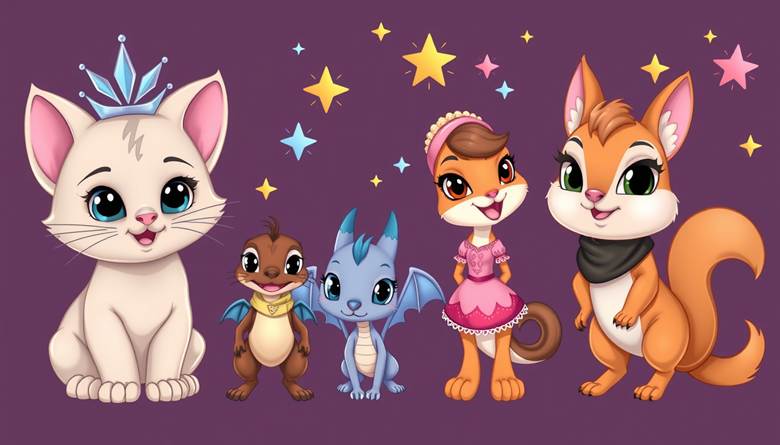
📚 Chapter 5: Princess Pets & Sidekick Stars
Every fairy tale needs a faithful friend! From a bold baby dragon to a goofy squirrel who steals cookies, sidekicks bring heart, humor, and heroism to every story. In this chapter, you’ll draw adorable animal companions that help, cheer up, or challenge their royal besties.
✨ What You’ll Learn:
✔️ How to draw cute animal sidekicks like kittens, dragons, and forest friends
✔️ How to design different sidekick styles: brave, sassy, or silly
✔️ How to match a pet’s personality and look with their princess (or prince!)
✔️ Using accessories, expressions, and poses to show personality
🐾 What Makes a Sidekick Shine?
Disney sidekicks are more than cute, they’re unforgettable! Whether they help save the kingdom or just crack a joke, each one adds something magical.
Here are three classic Sidekick Styles to draw:
🛡️ 1. Brave & Loyal
- Eyes full of fire, ready to protect
- Posture: tall, alert, proud
- Examples: baby dragon, tiny tiger, bold puppy
- Accessories: armor, scarf, or magic collar
😎 2. Sassy & Smart
- Eyebrow raised, sly smile
- Posture: tail flicking, arms crossed, confident tilt
- Examples: sneaky cat, fox, or fashionable bird
- Accessories: sunglasses, crown, or gem necklace
🤪 3. Goofy & Loveable
- Big round eyes, tongue sticking out, floppy limbs
- Posture: tangled or clumsy pose, rolling on the ground
- Examples: chubby bunny, chatty chipmunk, waddling duck
- Accessories: bowtie, backpack, snack in hand
🖊️ Step-by-Step: Drawing a Princess Kitten
Let’s design a royal feline who purrs with personality.
① Sketch the Shape
Start with a large round head and tiny, soft body. Add big ears and a puff of fur on top.
② Draw the Eyes & Face
Use huge, sparkling eyes with long lashes. Add a tiny heart-shaped nose and soft whiskers.
③ Pose It!
- Brave: One paw forward, tail raised like a banner
- Sassy: Eyes narrowed, head tilted, tail curled
- Goofy: Tongue out, belly showing, paw chasing own tail
④ Add Personality
Accessories make magic! Try:
- A sparkly collar with a royal gem
- A tiara perched at an angle
- A satchel with royal scrolls
🐉 Other Sidekicks to Try
🐉 Baby Dragon
- Round belly, small wings, and big curious eyes
- Smoke puffs or flame hearts from the nose
- Add a saddle, royal ribbon, or tiny sword
🐿️ Forest Friend (like a squirrel or raccoon)
- Chubby cheeks and bushy tails
- Holding acorns, flowers, or a tiny book
- Add a messenger bag or little cloak
🐦 Songbird
- Round shape, fluttery wings, musical notes around
- Crown made of leaves or feathers
- Add sparkles on wings for magical flight
👸 Match the Sidekick to Their Royal
Think of your princess’s personality and style, then create a sidekick that complements her:
| Princess Style | Matching Sidekick |
| Dreamy & Gentle | Shy bunny or songbird with flowers |
| Adventurous & Brave | Baby dragon, wolf pup, or flying squirrel |
| Bookish & Clever | Owl with glasses, raccoon with scrolls |
| Fashionable & Fun | Fancy cat, parrot with beads, llama with accessories |
| Kind & Nature-Loving | Deer, fox, or hedgehog with leaves in their fur |
🎨 Try This! Adopt-A-Sidekick Activity
- Draw a princess or prince
- Design their perfect sidekick — animal type, sidekick style, accessories
- Name them and write a short backstory.
- How did they meet?
- What’s their secret talent?
- What do they love (besides snacks)?
✨ Example:
Princess Raya is bold and smart. Her sidekick, Flint, is a sassy talking fox who always has a plan—and a pouch full of glitter bombs.
💡 Sidekick Design Tips:
- Big eyes = big emotion
- Accessories = instant personality
- Posture and tail positions = mood
- Glowing magic marks, sparkle trails, and shadows = charm
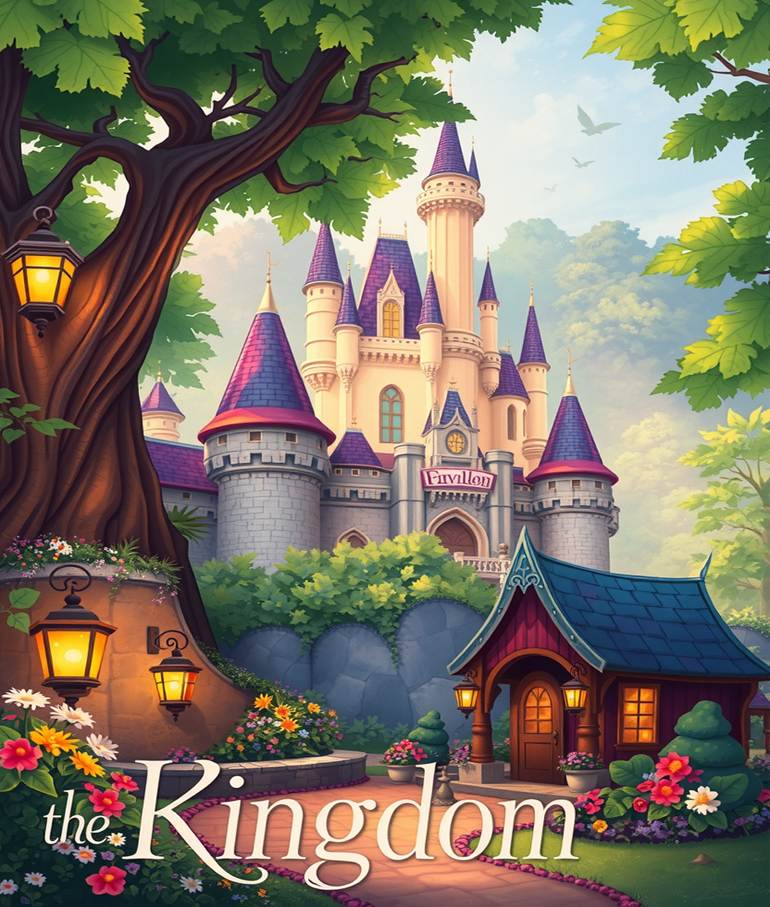
📚 Chapter 6: Around the Kingdom – Places & Props
Where does your princess live? What magical forest does her pet explore? From sparkling castles to cozy cottages and mysterious woods, every Disney-style adventure begins with an unforgettable setting. In this chapter, you’ll learn to draw story-rich backgrounds and magical props that make your characters feel truly at home.
✨ What You’ll Learn:
✔️ How to draw royal castles, cottages, and enchanted forests
✔️ Add magical props like treasure chests, crystal mirrors, and floating lanterns
✔️ Use shapes, textures, and sparkles to turn a background into a scene
✔️ Make simple scenery feel full of story
🏰 Drawing Storybook Places
🏰 Royal Castle
- Shape: Use tall towers, rounded domes, and waving flags
- Add-ons: Draw balconies, stained glass windows, and bridges over clouds
- Tips: Use soft curves for a dreamy look or sharp angles for a mysterious one
Make it magical by adding:
- Glowing windows
- Floating sparkles above the tallest tower
- A heart-shaped door or moon bridge
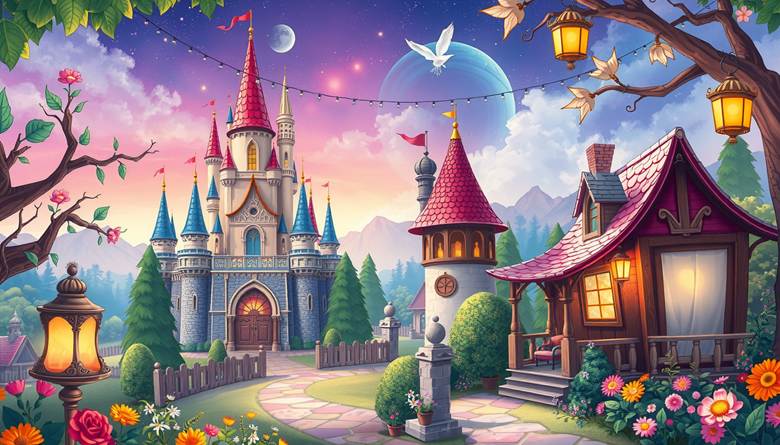
🏡 Village Cottage
- Shape: Small and round with a thatched or tiled roof
- Windows: Add flower boxes and shutters
- Chimney Smoke: Curling hearts or stars coming from the chimney = instant magic
Scenery Ideas:
- Mushrooms, wooden fences, garden gnomes
- Winding stone paths with glowing footprints
- A forest animal peeking from behind a tree
🌳 Enchanted Forest
- Trees: Use swirly trunks, oversized leaves, and hanging lanterns
- Background: Misty layers, twinkling lights between branches
- Creatures: Glowing butterflies, sleepy owls, mysterious shadows with glowing eyes
Magical Effects:
- Add light beams or sparkles around trees
- Hide a tiny door or a glowing mushroom ring
- Make vines form heart shapes or spiral paths
🪞 Magical Props for Adventure
💎 Crystal Mirror
- Frame it with gems, leaves, or sunbursts
- Reflect a sparkle or secret in the glass
- Add floating symbols or a swirling mist inside
🧰 Treasure Chest
- Add curved wood texture and golden corners
- Overflowing with gems, crowns, or enchanted objects
- Keep it locked with a glowing keyhole (what’s inside?)
🕯️ Floating Lantern
- Use warm glow and soft flame sparkles
- Draw them drifting into the night sky
- Add wishes written on the side or tied to the base
🎨 Try This! Build a Royal Scene
- Choose a setting: Castle, forest, cottage, tower
- Add props: One magical item (mirror, lantern, treasure)
- Fill with life: Add sparkles, shadows, paths, birds, or pets
- Tell a Story: Who lives here? What just happened? What’s about to happen?
💡 Tips to Make Settings Feel Alive
- Use layers: Big shapes in the back, detailed ones in front
- Tell a story: Add signs of action—open gates, footprints, falling leaves
- Add magic: Sparkle trails, glowing stones, floating elements
- Balance details: Mix empty space with decoration so it’s not too busy
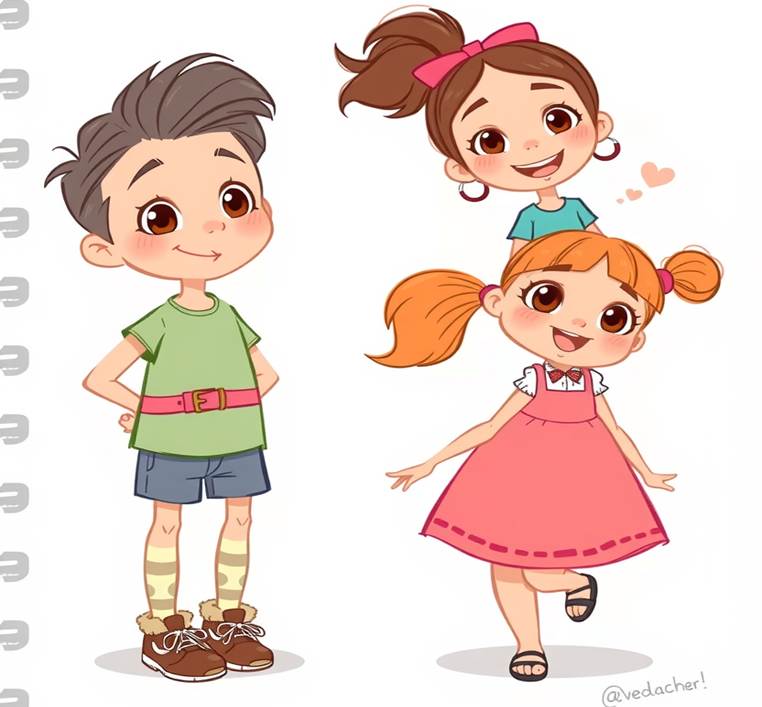
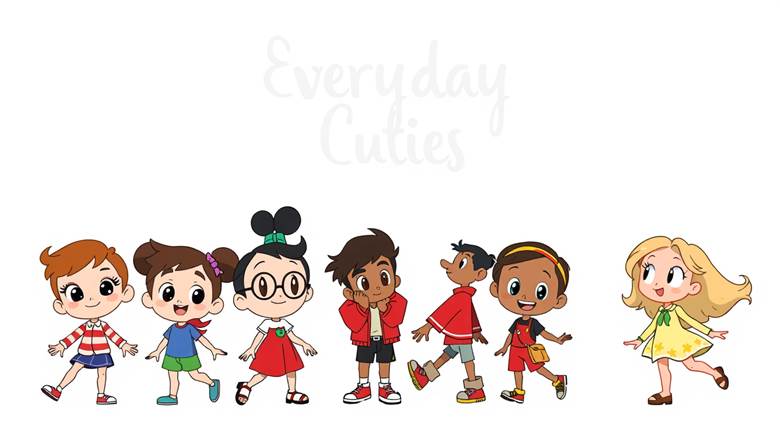
📚 Chapter 7: Everyday Cuties in Disney Style
Not all Disney magic happens in castles, sometimes it’s in a cozy sweater, a fun hairstyle, or a dreamy walk through the park. In this chapter, you’ll learn to draw people just like you, dressed in everyday outfits but sprinkled with charm, style, and storybook sparkle.
✨ What You’ll Learn:
✔️ How to draw kids, teens, and adults in a Disney-inspired look
✔️ Design everyday outfits with flair and personality
✔️ Pose characters walking, skipping, or daydreaming
✔️ Add little style extras like backpacks, hats, and sparkle effects
🧒👧 Everyday People, Disney Style
Disney-style humans have some key features:
- Big, expressive eyes (with sparkle dots!)
- Rounded faces and soft features
- Playful or relaxed posture
- Details that hint at their mood or hobby
Whether it’s a kind grandpa or a curious toddler, you can add charm to anyone!
🖊️ Step-by-Step: Drawing a Whimsical Teen
Let’s draw a fun, casual teen full of personality and dreamer vibes!
① Start with a Soft Silhouette
Draw a rounded head and a long, slightly curved neck. Keep the body relaxed—use gentle S-curves for posture.
② Draw Expressive Eyes & Face
Place the eyes large and spaced apart. Add a small nose and curved, friendly mouth. A few freckles or blushing cheeks make it cuter!
③ Add Hair & Accessories
Try a messy bun, big headphones, a cap, or colorful clips. Keep it fun and youthful.
④ Design the Outfit
Use basic shapes: a hoodie, flared skirt, jeans, or layered jackets. Disney fashion is fun, bold, and cozy. Add hearts on socks, or stars on a backpack.
⑤ Pose It!
- Walking: Arms swinging, one foot forward
- Skipping: One knee up, arms light and bouncy
- Daydreaming: Head tilted up, hands clasped behind back or holding a book
👨👩👧 Drawing All Ages with Charm
👶 Little Kids
- Big heads, tiny bodies
- Oversized clothes or shoes for extra cuteness
- Expressions: Curious, sleepy, giggly
👩 Teens
- Slim but rounded features
- Trendy outfits with flair (stripes, patches, sneakers)
- Expressions: Confident, shy, cool
👨🦳 Grown-Ups
- Gentle lines around the eyes
- Friendly posture, open arms, storytelling hands
- Props: Coffee mugs, books, umbrellas
🎒 Everyday Props with Personality
Turn simple items into storytelling tools:
- 🎧 Headphones = music lover
- 📚 Backpack or book = student or dreamer
- ☔ Umbrella = magical rainy-day adventure
- 🧢 Hat = sporty, shy, or stylish
Add cute touches:
- Sparkles near their sneakers
- Heart or star patterns on their clothes
- A little pet peeking from a pocket or bag
🎨 Try This! Draw Your Disney Self
Create your own Disney-style character!
- Start with you — or someone you know!
- Choose an outfit — hoodie? dress? cool jacket?
- Add your vibe — dreamy, sporty, silly, shy?
- Draw your pose — skipping to school, reading in the park, waving hello!
- Add accessories — favorite shoes, backpack, phone, or sketchbook
💬 Bonus: Give your character a name, favorite song, and secret wish!
💡 Quick Tips for Maximum Cuteness:
✔️ Keep faces soft and open
✔️ Exaggerate eyes, hair, and expression
✔️ Use big gestures and fun posture
✔️ Let outfits tell part of the story
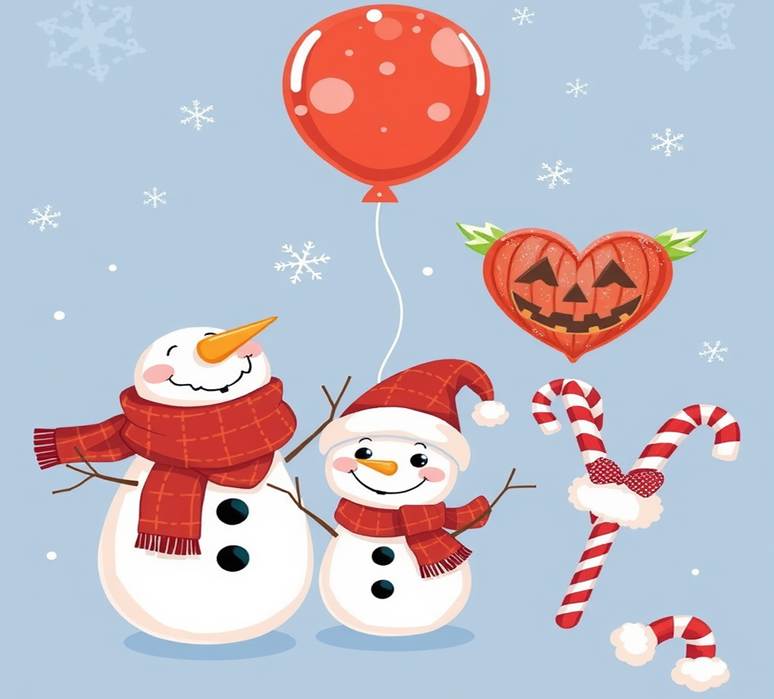
📚 Chapter 8: Holiday Cheer & Seasonal Fun
Every season brings its own magic, and Disney-style drawings capture that spirit with smiles, sparkling, and lots of heart. Whether it’s a snowman bundled up for winter, a mischievous pumpkin glowing at Halloween, or a fluttering heart in the spring, this chapter shows you how to add holiday cheer and seasonal joy to your art.
✨ What You’ll Learn:
✔️ Drawing classic holiday characters with Disney charm
✔️ Adding festive accessories like scarves, hats, and wings
✔️ Using themed sparkles, glows, and warm colors to set the mood
✔️ Making any season feel magical and fun
☃️ Winter Wonders: Snowmen & More
Drawing a Cozy Snowman
- Shape: Three stacked snowballs, big at the bottom, small on top
- Face: Carrot nose, coal eyes, big smile with rosy cheeks
- Accessories: Add a colorful scarf, mittens, and a jaunty hat
- Pose: Arms made of twigs waving hello or holding a snowball
Add magic: Draw snowflakes drifting down and soft sparkles on the scarf. Use light blue and white shading for chilly sparkling.
🎃 Spooky & Sweet: Halloween Pumpkins
Drawing a Grinning Pumpkin
- Shape: Round with deep grooves
- Face: Big toothy grin, wide eyes with mischief or surprise
- Accessories: Witch hat, little bat friends, glowing candle inside
- Pose: Sitting on a patch of autumn leaves or glowing by moonlight
Add magic: Flickering candlelight glow inside the pumpkin and sparkly cobwebs around. Use orange, purple, and black for a spooky yet fun vibe.
💖 Valentine’s Day: Hearts with Wings
Drawing a Flying Heart
- Shape: Classic heart with soft curves
- Face: Smiling eyes, blushing cheeks, puckered lips
- Accessories: Tiny angel wings, sparkly dust trails, or a bow and arrow
- Pose: Hovering in mid-air or floating gently down
Add magic: Draw twinkling stars and soft pink glows. Use warm reds, pinks, and gold sparkles to spread love.
🌷 Springtime Smiles: Flowers with Eyes
Drawing a Happy Flower
- Shape: Round flower head with big petals
- Face: Cheerful eyes and a beaming smile at the flower’s center
- Accessories: Little leaves for hands, a grass skirt, or tiny boots
- Pose: Swaying in a gentle breeze or reaching for sunlight
Add magic: Add butterflies, dewdrops sparkling, and sunbeams warming the petals. Use pastel colors with bright green accents.
🎨 Try This! Seasonal Drawing Challenge
Create your own festive friend for each season:
- A snowman with a magical glowing scarf
- A pumpkin that tells spooky jokes
- A heart that flutters over a garden party
- A flower that sings with the birds
Give each character a name and a favorite holiday tradition. Draw them in their seasonal scene, filled with sparkles, warmth, and joy.
💡 Tips for Seasonal Sparkle & Warmth
- Use color palettes that match the season: cool blues for winter, fiery oranges for fall, soft pinks for Valentine’s, fresh greens for spring
- Add themed sparkles like snowflakes, stars, hearts, or flower petals
- Use soft glows and shadows to create cozy or magical light effects
- Show movement: drifting snow, fluttering wings, blowing leaves
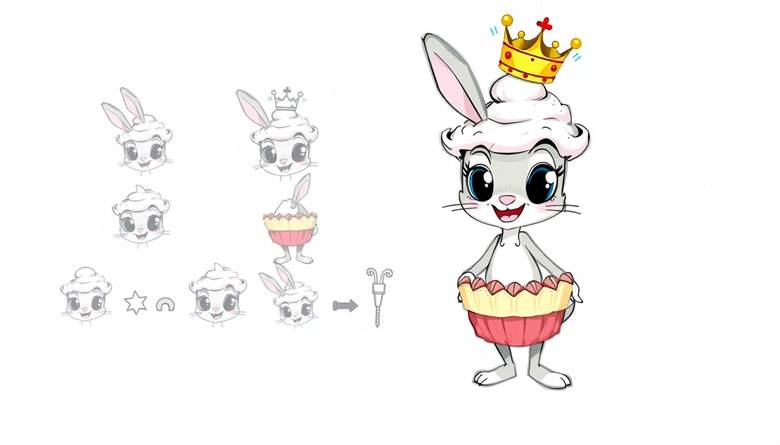
📚 Chapter 9: Create Your Own Characters
Now it’s your turn to be the magic-maker! In this chapter, you’ll learn how to build your own Disney-style character from the ground up — mixing animals, food, and even magical objects to create something truly unique and full of personality.
✨ What You’ll Learn:
✔️ How to combine different elements — animal features, food shapes, and everyday objects
✔️ Tips for designing outfits, poses, and expressions
✔️ How to invent a fun backstory that brings your character to life
✔️ Ways to add personality with accessories and special effects
🐾 Step 1: Mix & Match Elements
Think about what inspires you:
- Animal features: fluffy ears, whiskers, wings, tails
- Food shapes: cupcake frosting, ice cream scoops, juicy fruit slices
- Objects: teacups, pencils, lanterns, or magical trinkets
Try combining two or more times, maybe a bunny with cupcake ears, or a floating pencil with a fish tail!
🖌️ Step 2: Sketch Your Base Shape
- Start simple with basic shapes (circles, ovals) for the head and body
- Play with proportions — big heads, tiny feet, long tails — to create cuteness or whimsy
- Add facial features: big eyes, small noses, wide smiles
👗 Step 3: Dress Your Character
- Pick clothes or accessories that match their personality or story
- Use bows, hats, scarves, or tiny glasses
- Mix patterns like stars, stripes, or polka dots for fun flair
🏃♂️ Step 4: Pose & Express
- Choose a pose that shows who they are: playful, brave, shy, or silly
- Use body language — a raised paw, tilted head, or wiggly tail
- Add expressive eyes and mouths — sparkling, sleepy, surprised, or smirking
📖 Step 5: Create a Backstory
Ask yourself:
- Who is your character?
- Where do they live?
- What’s their favorite hobby or magical power?
- Do they have friends or a mission?
Write a few sentences to make your character come alive!
🎨 Try This! Build a Character Challenge
- Pick one animal, one food, and one object to combine.
- Sketch your character’s body and face using simple shapes.
- Dress them up with hats, scarves, or wings.
- Choose a fun pose — maybe dancing, sleeping, or flying!
- Write their name and a short story about them.
💡 Character Creation Tips:
- Don’t be afraid to be silly or strange — that’s where magic happens!
- Use bright, cheerful colors and soft lines for Disney-style charm
- Add sparkles, glow lines, or floating hearts for extra personality
- Imagine your character’s voice and attitude will help you draw expressions.
📚 Chapter 10: Put It All Together – Your Own Disney Sketch World
You’ve learned to draw magical animals, food friends, enchanted objects, and charming people. Now it’s time to bring it all together in your very own Disney-style masterpiece! Whether you want to create a colorful poster, an exciting story page, or a fun comic strip, this chapter will help you design, color, and finish your art like a pro.
✨ What You’ll Learn:
✔️ How to plan and design a complete Disney-themed scene
✔️ Combining backgrounds, characters, and props into one picture
✔️ Tips for coloring, shading, and adding magical finishing touches
✔️ Ideas for making your artwork tell a story
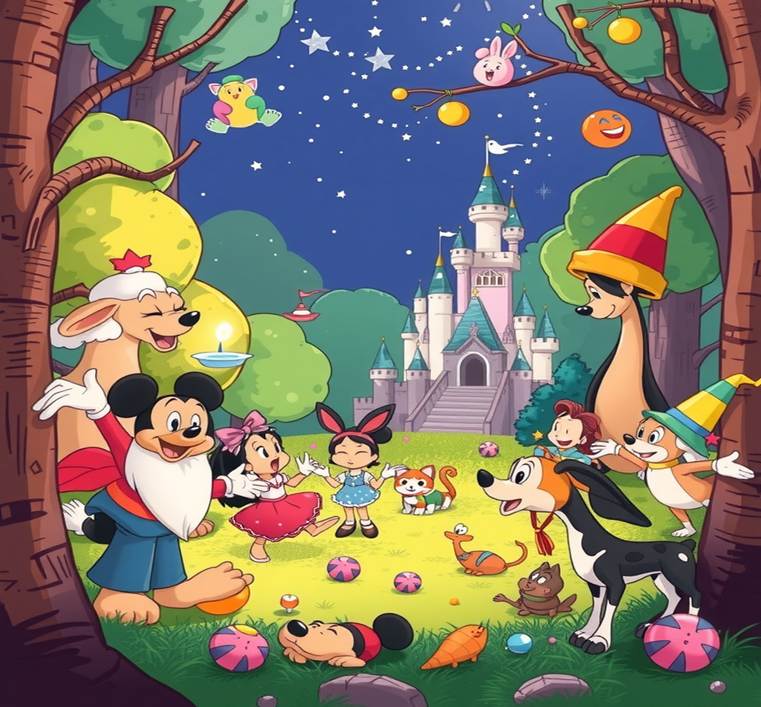
🖌️ Step 1: Plan Your Scene
Start by imagining a story or moment:
- Is your scene set in a royal castle, a cozy cottage, or a bustling village?
- Who are the main characters? A brave dragon, a playful bunny, or a magical cupcake?
- What props or magical items are nearby? Floating lanterns, treasure chests, or sparkling flowers?
Sketch a rough layout:
- Place your characters first — they are the stars!
- Add important props around them.
- Fill in the background last, keeping it simple but magical.
🎨 Step 2: Drawing Your Composition
- Use soft, rounded shapes to keep that Disney charm
- Vary sizes to create depth: big in front, small in back
- Leave space around characters so they stand out
- Add gentle curves to paths, trees, or clouds for whimsy
🌈 Step 3: Color Your World
- Choose a color palette: soft pastels, bright primaries, or warm earth tones
- Color base layers flat first—don’t worry about shading yet!
- Add shading with a slightly darker shade on one side for depth
- Use highlights with white or light colors on edges to create shine
- Blend softly with gentle strokes to keep that smooth Disney look
✨ Step 4: Add Magical Finishing Touches
- Draw sparkles, stars, or glowing dust around characters and objects
- Use soft glows behind light sources like lanterns or magic potions
- Add shadow under characters and props to “ground” them in the scene
- Use motion lines to show movement—fluttering wings, twirling skirts, or bouncing tails
🖼️ Step 5: Create Your Final Masterpiece
- Choose your format: poster, story page, or comic strip panel
- If you make a comic, add speech bubbles and fun dialogue
- Give your characters names and write a short caption or story to go with your art
- Sign your work proudly, it’s your magical world!
🎨 Try This! Design Your Disney Sketch World
- Pick a setting: enchanted forest, castle courtyard, or magical bakery
- Draw 2-3 characters with props you love
- Add a background with magical details
- Color it using your favorite palette
- Add sparkles and glows to finish
- Write a fun title or caption for your scene
💡 Pro Tips:
- Use layers if you’re drawing digitally—background, characters, props, effects
- Keep your lines clean but playful—don’t worry about perfection!
- Take breaks and come back with fresh eyes to spot details
- Look at Disney movies or art for inspiration and color ideas
🌟 Congratulations! You’ve learned how to create a magical Disney-style world from the ground up. Keep practicing, dreaming, and drawing—your imagination is your greatest tool.
Put It All Together – Your Own Disney Sketch World
In this final chapter, you learn how to combine everything you’ve drawn—characters, magical props, and enchanting backgrounds—into a complete Disney-style artwork. Start by planning your scene and sketching a layout that tells a story. Draw your characters with soft, whimsical shapes, then add a colorful background and fun props. Use shading and highlights to give depth and magic, and finish with sparkles, glows, and motion lines to bring your scene to life. Whether you create a poster, story page, or comic strip, this chapter helps you craft your very own magical Disney world, ready to share with everyone!
Book Summary
Draw Magic is a whimsical, step-by-step drawing guide designed for kids and the young at heart who want to learn how to create over 300 delightful drawings in the iconic Disney style. With its focus on expressive eyes, joyful poses, and storytelling details, this book teaches you how to bring animals, fantasy foods, everyday objects, charming characters, and magical scenes to life — all infused with that unmistakable Disney charm.
What You’ll Discover Across 10 Magical Chapters:
- Chapter 1: Master Disney-style expressive eyes and facial expressions to give your drawings heart and personality.
- Chapter 2: Learn to sketch magical creatures, big and small — from playful lions to sleepy bunnies — and dress them up with fun accessories.
- Chapter 3: Bring fantasy foods to life with smiling ice cream, dancing cupcakes, and talking tacos full of character.
- Chapter 4: Transform ordinary objects into enchanted treasures with floating books, sparkly potions, and magical teacups.
- Chapter 5: Create adorable princess pets and sidekicks, from brave dragons to sassy kittens, and match their personalities to their owners.
- Chapter 6: Build story-filled settings like royal castles, enchanted forests, and cozy cottages, complete with magical props.
- Chapter 7: Draw everyday kids, teens, and grown-ups with Disney flair—posing them walking, skipping, or daydreaming in whimsical outfits.
- Chapter 8: Celebrate the seasons with festive characters like winter snowmen, Halloween pumpkins, Valentine hearts with wings, and spring flowers with eyes.
- Chapter 9: Design your very own unique Disney-style characters by combining animals, food, and objects, then dress and pose them with a story.
- Chapter 10: Pull it all together by creating your own Disney sketch world — a poster, story page, or comic strip — with tips on coloring, shading, and finishing touches to complete your masterpiece.
This joyful guide invites artists of all ages to dream big, play creatively, and bring their own magical worlds to life with every pencil stroke.